How to self-host a blog using Ghost?

In today's technology-driven world, your online presence matters more than ever, and starting a blog website is the first step in leaving your mark. If you're looking for a platform that combines simplicity and versatility, look no further than Ghost.
What is Ghost?
Ghost is a free and open-source content management system focused on blogging, email marketing, and subscription revenue, either by using Ghost.org's hosting service or by downloading and installing Ghost on your own hosting account.
Types of Hosting Methods
Ghost has 2 types of hosting methods:
- Self-host, you take the code and host it yourself
- Use Ghost.org that you pay monthly to host
This blog will dive into the aspects of self-hosting a blog website. But you must be pondering, why to choose self-host rather than Ghost.org which you pay monthly to host. Let’s look into it first.
Why self-hosted Ghost?
When it comes to using Ghost, you essentially have two pathways to choose from. The first option involves utilizing their hosting service, while the second allows you to host Ghost on a server of your selection. Both options have their merits and drawbacks, but one significant difference stands out, and that's the cost.
For those considering managed Ghost hosting, the entry-level plan starts at $25 per month when billed annually. This plan becomes essential when you wish to utilize a custom theme.
Moreover, adding a custom domain to your blog for a more professional appearance is an extra cost to consider. Understandably, this may not be the most budget-friendly option when you're embarking on your blogging journey.
Now, if we compare this to DigitalOcean, you can get the most affordable droplet for just $5 per month, billed on a monthly basis. The beauty of it is that you can scale your droplet up or down as needed, providing flexibility. This cost-effective choice provides excellent value and flexibility for bloggers looking to keep their expenses in check.
Clearly, hosted Ghost is nearly six times more expensive than its self-hosted counterpart. For this very reason, it makes compelling sense to seriously consider the self-hosted Ghost route.
Self-hosting a Ghost Blog comes with two options:
These are:
- Option 1: Using one-click deploy from digital ocean
- Option 2: Using raw droplets from digital ocean
Requirements for self-hosted Ghost Blog
The basic requirements for running a self-hosted Ghost blog are:
- Content Delivery Network (Cloudflare)
- A Hosting Provider
- A Domain Name
- Business Email
The service you choose to fulfill any prerequisite that Ghost needs makes no difference. During setup, they will all cooperate.
Simply follow along with the provided screenshots, and you should be able to pull it off.
Option 1: Using one-click deploy from digital ocean
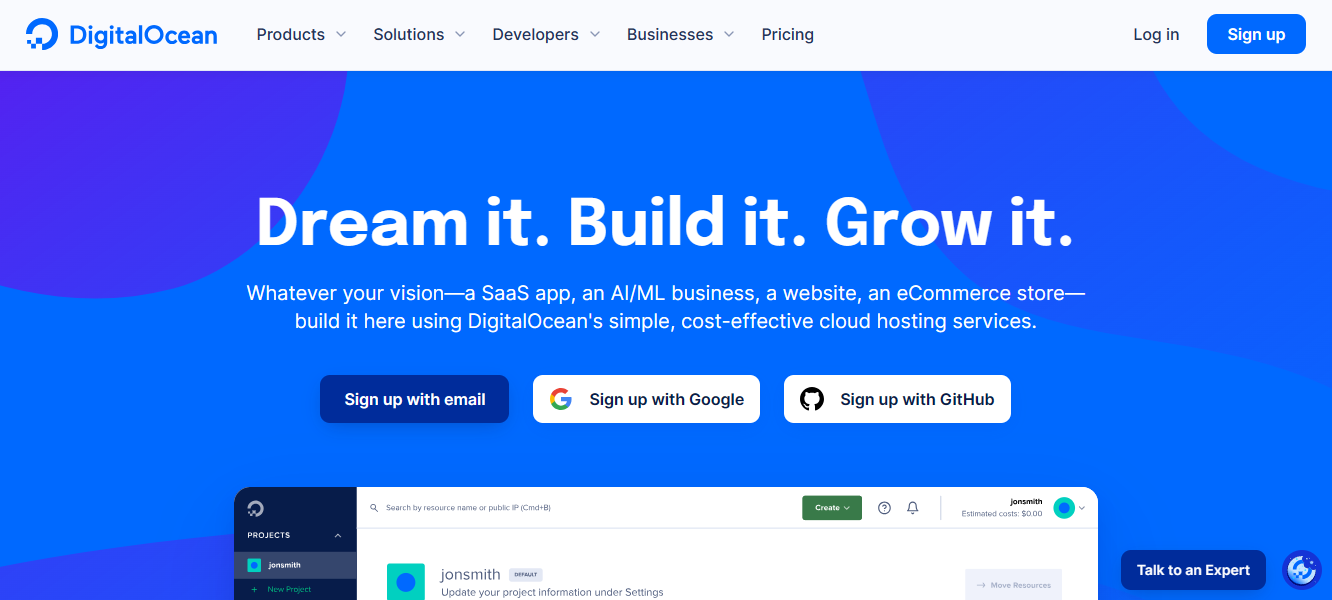
- Move to DigitalOcean | Cloud Hosting for Builders. On the landing page, various Signup options are present. Choose the one that you’re comfortable with and move forward.
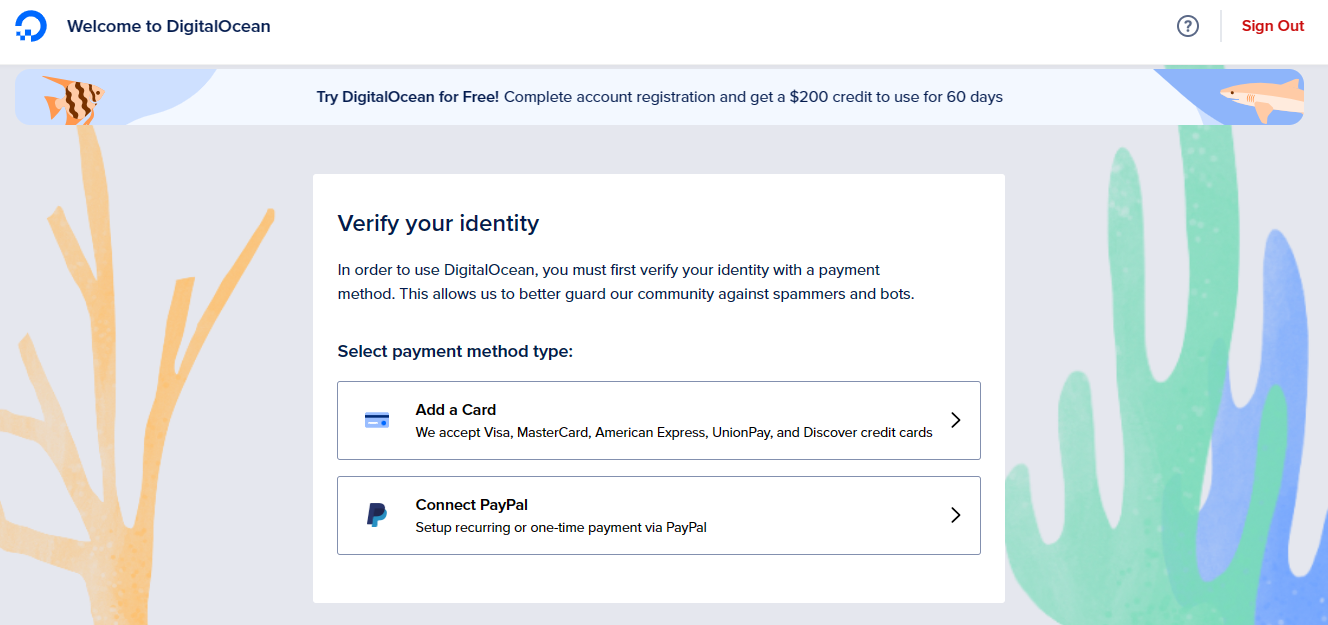
- You’ll be redirected to a page with some questions in front of you, fill in those and verify card details in order to move further.
- After successful registration and verification, you’ll be redirected to the page shown below.
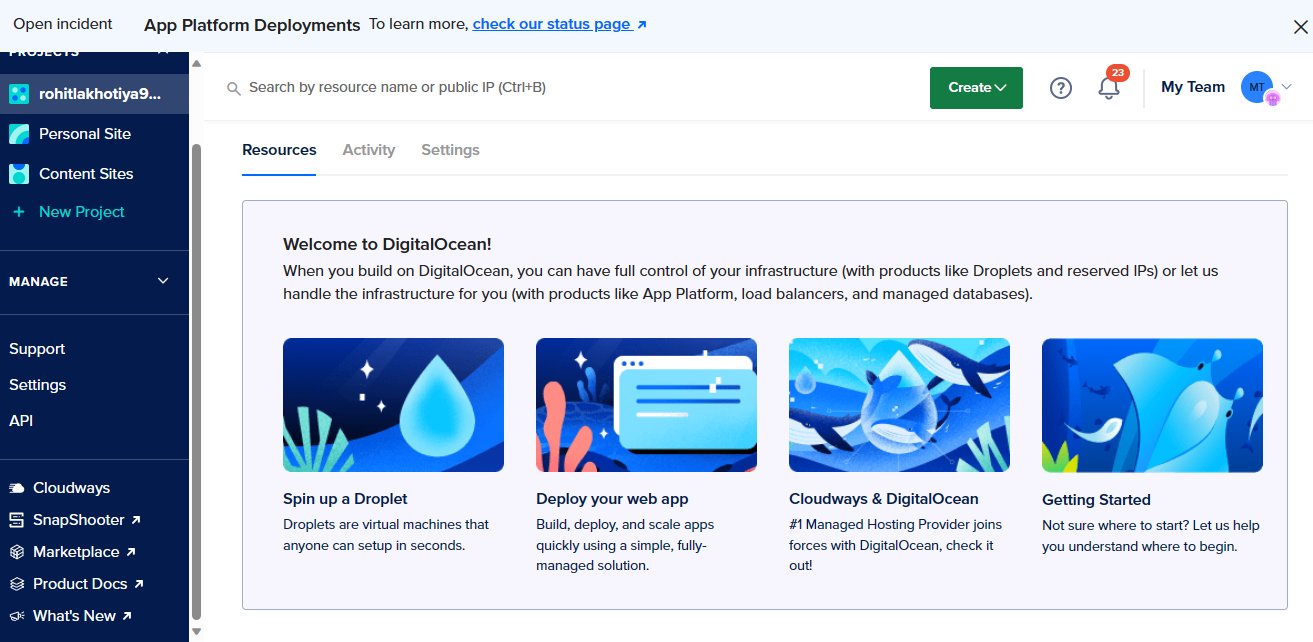
- Go to the left sidebar and click on MANAGE -> Droplets. Since we need to Create Droplets.
A page like this will pop up on your screen.

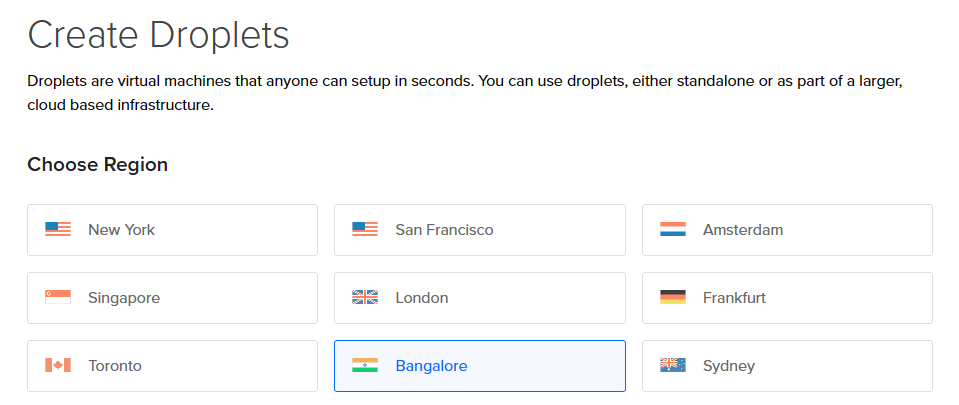
- Click on “Create”. There will be a lot of options but since we need to create a droplet we’ll be going with “Droplets”. A page with the options shown below will pop up on your screen.
- Choose the Closest Region i.e. your closest Datacenter.
- Go to Marketplace tab, type Ghost on the search bar, and then click Ghost result.
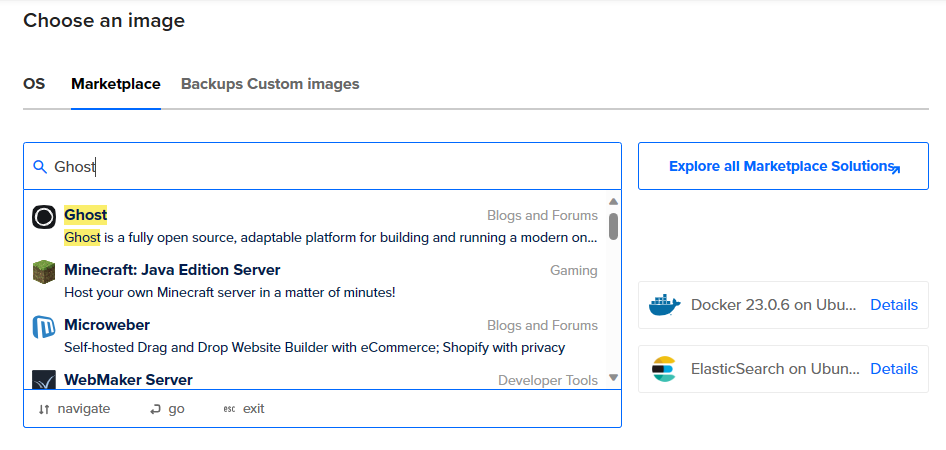
The droplet image contains the Ghost server and the necessary MySQL database.
- Choose a plan for the new droplet:
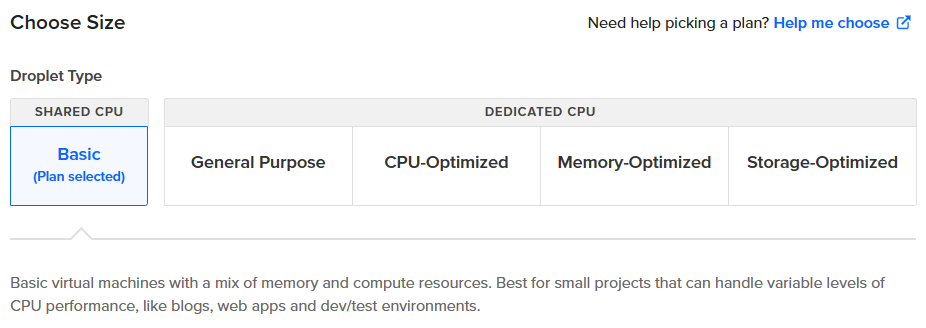
Initially for getting started, you can choose the cheapest one at first. Usually the $6 base plan is sufficient to run Ghost without issues. If you’re planning to run a site with high traffic or one with lots of members, then you may want to choose an option with more resources. You'll be able to update the plan following the evolution of your needs.

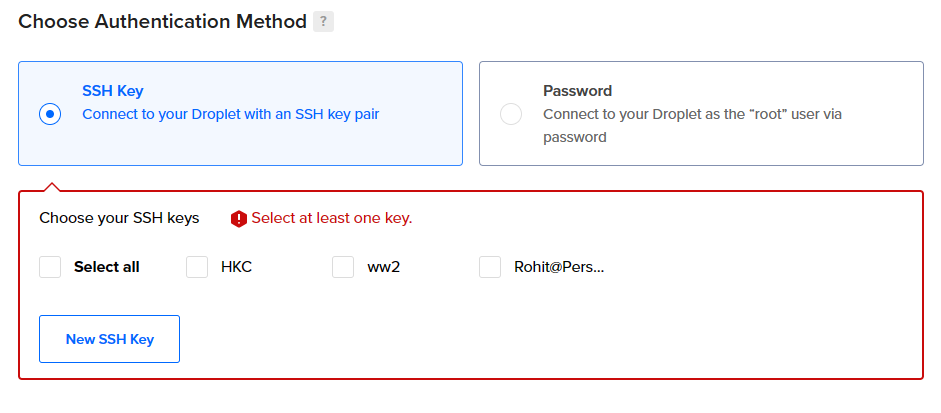
- Configure the authentication to the droplet. Many bots on the internet attempt brute-force attacks. For security purposes, choose "SSH keys". You can select among the available SSH keys or can create a new one by clicking the “New SSH Key” button.
- Cross-check and finalize the details before finally creating the droplet.

- Click on “Create Droplet” in order to finish creating the droplet.

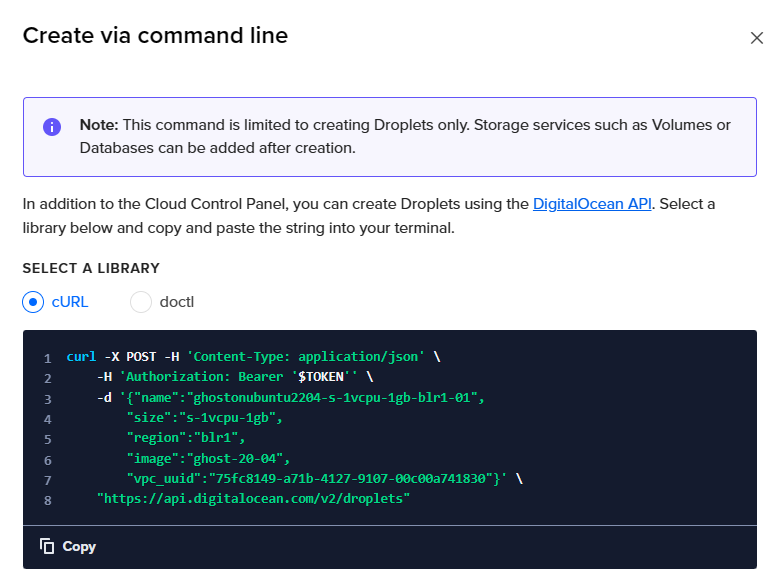
- Alternatively, you can also create a droplet through the command line by clicking on “Create via Command Line”.
Configure the Ghost installation
After the Droplet is created, you’ll need to log into the Ghost Droplet to complete the server setup.
- Open a terminal and connect to the Droplet using your IP address.
ssh root@use_your_droplet_ip
After logging in, the Droplet will automatically make sure that it is running the most recent version of Ghost. Further, it will prompt you to press ENTER to finalize and end the setup. When finished, you’ll see a prompt for a few details:
- Your domain (an A record is needed)
- Your email address (for SSL)
Ghost will prompt you for two details:

1. Your domain
 - Add an A Record -> xxx.xxx.xxx.xxx & ensure the DNS has fully propagated
 - Or alternatively enter <http://xxx.xxx.xxx.xxx>
2. Your email address (only used for SSL)

Press enter when you're ready to get started!
Now, you can set up your domain and DNS, for this create an A-Record from your domain, pointing at your server’s IP address, then press Enter in terminal when you’re ready. Some more prompts will follow to finish configuring Ghost.
This step is crucial because, until you configure the admin user, anyone who stumbles upon the site can set up the administrative user and potentially gain control of the Ghost site.
Once the installation and setup are fully complete, you can access the new Ghost site by visiting the website address or Droplet IP address in your browser.
Once finished, go to https://<your-domain>/ghost and you can follow How to set up your blog on Ghost.
Your blog's appearance is your digital signature, so it's important to get it right. There are a lot of free themes available on the marketplace but in case you want a premium theme you can go with the Inkwell theme (I am the creator of this theme, and this website uses the same theme).
Designed especially for writers and creators, Inkwell offers a perfect blend of aesthetics and functionality. To see it in action, you can check the demo Inkwell Theme Demo.

You can also buy this theme on Gumroad.
Option 2: Using raw droplets from digital ocean
Prerequisites
The officially recommended production installation requires the following stack:
- Ubuntu 20.04 or Ubuntu 22.04
- NGINX (minimum of 1.9.5 for SSL)
- A supported version of Node.js
- MySQL 8
- Systemd
- A server with at least 1GB of memory
- A registered domain name
Before getting started you should set up a working DNS A-Record from your domain, pointing to the server’s IP address. This must be done in advance so that SSL can be configured during setup.
Steps:
- Server setup
- Create a new user Open up your terminal and log in to your new server as the root user:
# Login via SSH
ssh root@your_server_ip

# Create a new user and follow prompts
adduser <user>
Note: Using the user name ghost causes conflicts with the Ghost-CLI, so it’s important to use an alternative name.# Add user to superuser group to unlock admin privileges
usermod -aG sudo <user>
# Then log in as the new user
su - <user>
- Update packages Ensure package lists and installed packages are up to date.
# Update package lists
sudo apt-get update

# Update installed packages
sudo apt-get upgrade
Follow any prompts to enter the password you just created in the previous step.
- Install NGINX Ghost uses an NGINX server and the SSL configuration requires NGINX 1.9.5 or higher.
# Install NGINX
sudo apt-get install nginx
If ufw was activated, the firewall allows HTTP and HTTPS connections. Open Firewall:
sudo ufw allow 'Nginx Full'
- Install MySQL Next, you’ll need to install MySQL to be used as the production database.
# Install MySQL
sudo apt-get install mysql-server
- Install Node.js You will need to have a supported version of Node installed system-wide in the manner described below. If you have a different setup, you may encounter problems.
# Download and import the Nodesource GPG key
sudo apt-get update
sudo apt-get install -y ca-certificates curl gnupg
sudo mkdir -p /etc/apt/keyrings
curl -fsSL <https://deb.nodesource.com/gpgkey/nodesource-repo.gpg.key> | sudo gpg --dearmor -o /etc/apt/keyrings/nodesource.gpg

# Create deb repository
NODE_MAJOR=18 # Use a supported version
echo "deb [signed-by=/etc/apt/keyrings/nodesource.gpg] <https://deb.nodesource.com/node_$NODE_MAJOR.x> nodistro main" | sudo tee /etc/apt/sources.list.d/nodesource.list

# Run update and install
sudo apt-get update
sudo apt-get install nodejs -y
- Install Ghost-CLI Ghost-CLI is a command line tool to help you get Ghost installed and configured for use, quickly and easily. The npm module can be installed with
npmoryarn.
sudo npm install ghost-cli@latest -g
Once installed, you can always run ghost help to see a list of available commands.
- Install GhostOnce your server is correctly set up and
ghost-cliinstalled, you can install Ghost itself. The following steps are the recommended setup. If you need more fine-grained control, the CLI has flags and options that allow you to break down and customize the install steps.
- Create a directory Ghost must be installed in its own directory, with a proper owner and permissions.
# Create directory: Change `sitename` to whatever you like
sudo mkdir -p /var/www/sitename

# Set directory owner: Replace <user> with the name of your user
sudo chown <user>:<user> /var/www/sitename

# Set the correct permissions
sudo chmod 775 /var/www/sitename

# Then navigate into it
cd /var/www/sitename
- Run the install process Now we install Ghost with one final command.
ghost install
- Install questions During installation, the CLI will ask a number of questions to configure your site.
How to update the Ghost config?
For self-hosted Ghost users, a custom configuration file can be used to override Ghost’s default behavior. This provides you with a range of options to configure your publication to suit your needs.
When you install Ghost using the supported and recommended method using ghost-cli, a custom configuration file is created for you by default. There are some configuration options that are required by default, and many optional configurations.
The three required options are url and database which are configured during setup, and mail which needs to be configured once you’ve installed Ghost.
Custom configuration files
The configuration is managed by nconf. A custom configuration file must be a valid JSON file located in the root folder and changes to the file can be implemented using ghost restart.
Since Node.js has the concept of environments built in, Ghost supports two environments: development and production. All public Ghost publications run in production mode, while development mode can be used to test or build on top of Ghost locally.
Check out the official install guides for development and production.
The configuration files reflect the environment you are using:
config.development.jsonconfig.production.json
Ghost in development
If you would like to start Ghost in development, you don’t have to specify any environment, because development is default. To test Ghost in production, you can use:
*NODE_ENV*=production node index.js
If you want to make changes when developing and working on Ghost, you can create a special configuration file that will be ignored in git:
config.local.json
This file is merged on top of config.development.json so you can use both at the same time.
Debugging the configuration output
Start Ghost with:
*DEBUG*=ghost:*,ghost-config node index.js
Running Ghost with config env variables
Start Ghost using environment variables that match the name and case of each config option:
*url*=http://ghost.local:2368 node index.js
For nested config options, separate with two underscores:
*database__connection__host*=mysql node index.js
Configuration options
| Name | Required? | Description | Careful Consideration |
|---|---|---|---|
| url | In production | Set the public URL for your blog | If using a subpath, enter the full path, https://example.com/blog/. If using SSL, always enter the URL with https://. |
| database | In production | Type of database used (default: MySQL) | Alternatively, you can configure sqlite3. |
| In production | Add a mail service | Configuring mail allows Ghost to send transactional emails such as user invitations, password resets, member signups, and member login links. With the help of a bulk email service, you can also configure Ghost to send newsletters to members. Ghost uses https://github.com/nodemailer/nodemailer/ under the hood, and tries to use the direct mail service if available. | |
| admin | Optional | Set the protocol and hostname for your admin panel | Admin can be used to specify a different protocol for your admin panel or a different hostname (domain name). It can’t affect the path at which the admin panel is served (this is always /ghost/). |
| server | Optional | Host and port for Ghost to listen on | The server host and port are the IP address and port number that Ghost listens on for requests. By default, requests are routed from port 80 to Ghost by nginx (recommended), or Apache. |
| privacy | Optional | Disable features set in https://github.com/TryGhost/Ghost/blob/2f09dd888024f143d28a0d81bede1b53a6db9557/PRIVACY.md | All features inside the privacy.md file are enabled by default. It is possible to turn these off in order to protect privacy: Update check, Gravatar, RPC ping, Structured data. |
| paths | Optional | Customise internal paths | The configuration of paths can be relative or absolute. To use a content directory that does not live inside the Ghost folder, specify a paths object with a new contentPath. |
| referrerPolicy | Optional | Control the content attribute of the meta referrer tag | Set the value of the content attribute of the meta referrer HTML tag by adding referrerPolicy to your config. origin-when-crossorigin is the default. Read through all possible https://www.w3.org/TR/referrer-policy/#referrer-policies/. |
| useMinFiles | Optional | Generate assets URL with .min notation | |
| storage | Optional | Set a custom storage adapter | |
| scheduling | Optional | Set a custom scheduling adapter | |
| logging | Optional | Configure logging for Ghost | |
| spam | Optional | Configure spam settings | |
| caching | Optional | Configure HTTP caching settings | |
| compress | Optional | Disable compression of server responses | |
| imageOptimization | Optional | Configure image manipulation and processing | |
| opensea | Optional | Increase rate limit for fetching NFT embeds from OpenSea.io | |
| tenor | Optional | Enable integration with Tenor.com for embedding GIFs directly from the editor | |
| Optional | Add support for rich Twitter embeds in newsletters | ||
| portal | Optional | Relocate or remove the scripts for Portal | |
| sodoSearch | Optional | Relocate or remove the scripts for Sodo search | |
| comments | Optional | Relocate or remove the scripts for comments |
Adapters
- Storage adapters
- Cache adapters
Blog URL
Enter the exact URL your publication will be available at and include the protocol for HTTP or HTTPS. For example, https://example.com. If you use HTTPS, Ghost-CLI will offer to set up SSL for you. Using IP addresses will cause errors.
MySQL hostname
This determines where your MySQL database can be accessed from. When MySQL is installed on the same server, use localhost (press Enter to use the default value). If MySQL is installed on another server, enter the name manually.
MySQL username/password
If you already have an existing MySQL database, enter the username. Otherwise, enter root. Then supply the password for your user.
Ghost database name
Enter the name of your database. It will be automatically set up for you unless you’re using a non-root MySQL user/pass. In that case, the database must already exist and have the correct permissions.
Set up a ghost MySQL user? (Recommended)
If you provided your root MySQL user, Ghost-CLI can create a custom MySQL user that can only access/edit your new Ghost database and nothing else.
Set up NGINX? (Recommended)
Sets NGINX up automatically enabling your site to be viewed by the outside world. Setting up NGINX manually is possible, but why would you choose a hard life?
Set up SSL? (Recommended)
If you used an https Blog URL and have already pointed your domain to the right place, Ghost-CLI can automatically set up SSL for you using Let’s Encrypt. Alternatively, you do this later by running ghost setup ssl at any time.
SSL certification setup requires an email address so that you can be kept informed if there is any issue with your certificate, including during renewal.
Set up systemd? (Recommended)
systemd is the recommended process manager tool to keep Ghost running smoothly. We recommend choosing yes but it’s possible to set up your own process management.
Start Ghost?
Choosing yes runs Ghost and makes your site work.
Future maintenance
Once Ghost is properly set up it’s important to keep it properly maintained and up to date. Fortunately, this is relatively easy to do using Ghost-CLI. Run ghost help for a list of available commands, or explore the full Ghost-CLI documentation.
What to do if the installation fails
If an install goes horribly wrong, use ghost uninstall it to remove it and try again. This is preferable to deleting the folder to ensure no artifacts are left behind.
If an install is interrupted or the connection is lost, use ghost setup it to restart the configuration process.
For troubleshooting and errors, use the site search and FAQ section to find information about common error messages.
In this tutorial, we've provided an overview of what Ghost is: a personalized blogging platform that puts a strong emphasis on simplicity and minimalism. Ghost empowers you to focus on creating content without the complexities of intricate design.
When you're launching a new blog, cost considerations are paramount. This is the primary reason for opting to run a self-hosted Ghost blog, especially if you plan to manage multiple blogs simultaneously.
DigitalOcean offers an efficient solution through its marketplace for effortlessly deploying Ghost. You'll only need to cover the server hosting expenses, making it an attractive choice for self-hosting your Ghost blog.
For next step you can configure SSL certificate with multiple domains with your new Ghost Installation
Congratulations! You've successfully established your self-hosted Ghost blog, and now you're ready to dive into the world of writing.


